
Operator Notes: this is a tactical, mentor-style playbook for agency operators who maintain multiple client WordPress installs. Read through the steps, adapt them to your environment, and use the checklist when you respond to malware or web shell events. This article focuses on real-world patterns and a repeatable, layered approach—think “wordpress hacks layered defense” as an operations mentality, not a single tool.
- How do hackers get persistent access to WordPress sites?
- Why layering matters
- Layer 1: Reduce initial attack surface
- Layer 2: Detect & contain malware and web shells
- Layer 3: Remove persistence and restore trust
- Operational playbook: step-by-step checklist
- Common persistence locations attackers exploit
- How to operationalize this across many clients
- Operator example: triage flow in practice
- Final checklist (quick reference)
- FAQ
How do hackers get persistent access to WordPress sites?
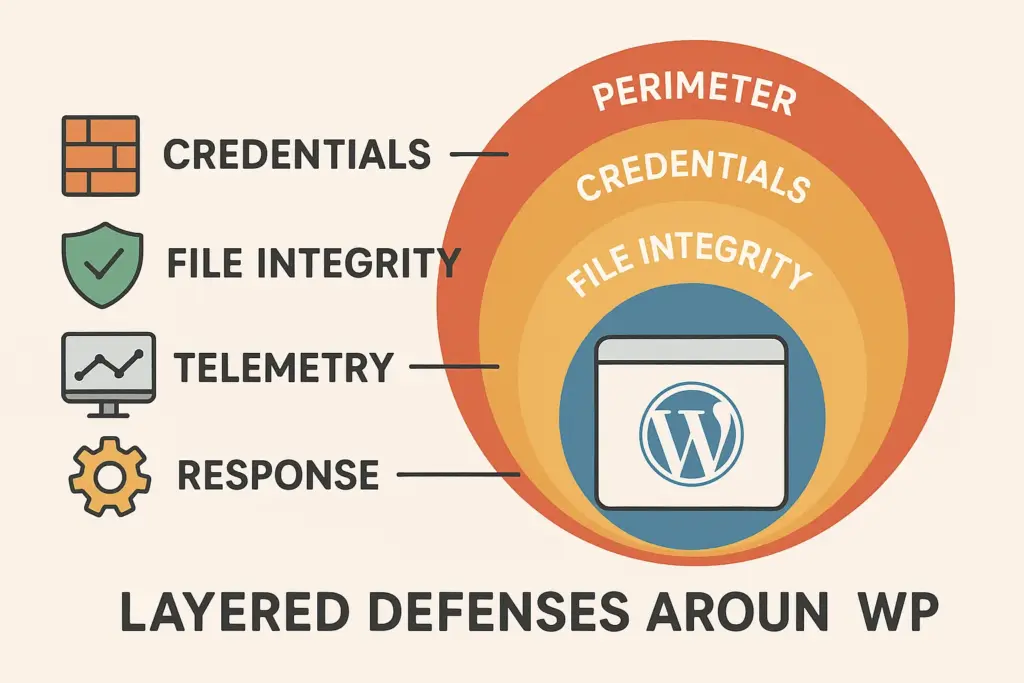
Layered defenses diagram for WordPress
Attackers gain persistence by inserting code or files that grant remote command execution, creating backdoor admin accounts, or abusing scheduled tasks and poorly protected credentials. Once persistence exists, they can return, escalate, and move laterally without re-exploiting the original vulnerability. Common persistence vectors include writable uploads, theme files, mu-plugins, and injected database options or cron jobs.
Why layering matters
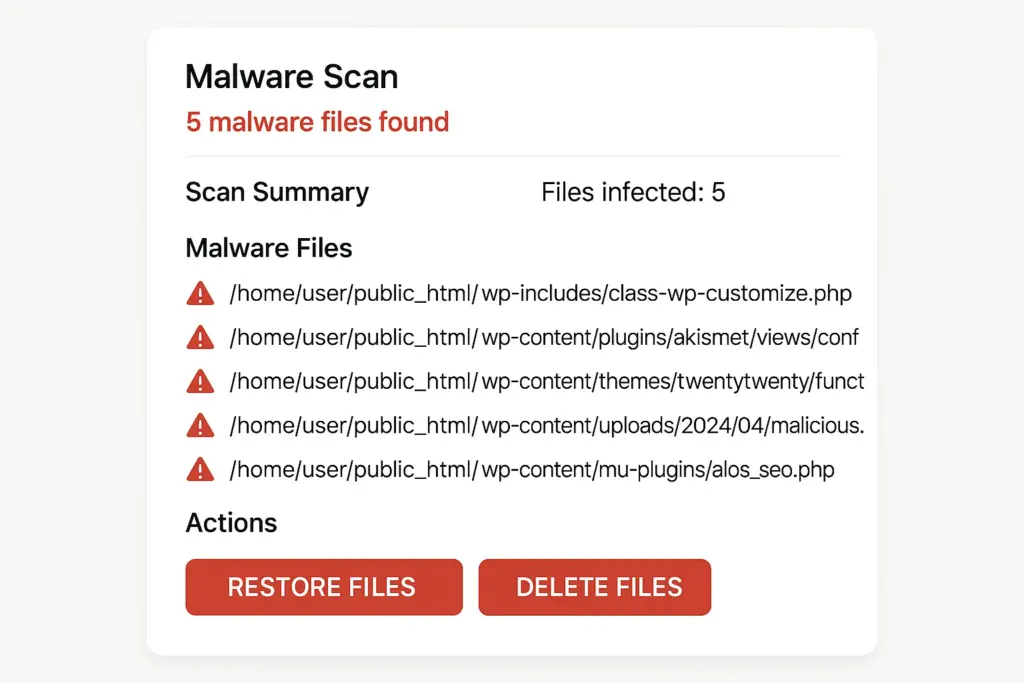
Mockup of a malware scan report showing flagged files
Defense-in-depth reduces single points of failure. An exploit or stolen credential may bypass one control, but multiple independent controls — credential hygiene, file integrity checks, telemetry, and rapid containment — make sustained access much harder and easier to detect. Operationalizing layered defense means you build overlapping detection and preventive controls so that when one fails, another raises an alert.
Layer 1: Reduce initial attack surface
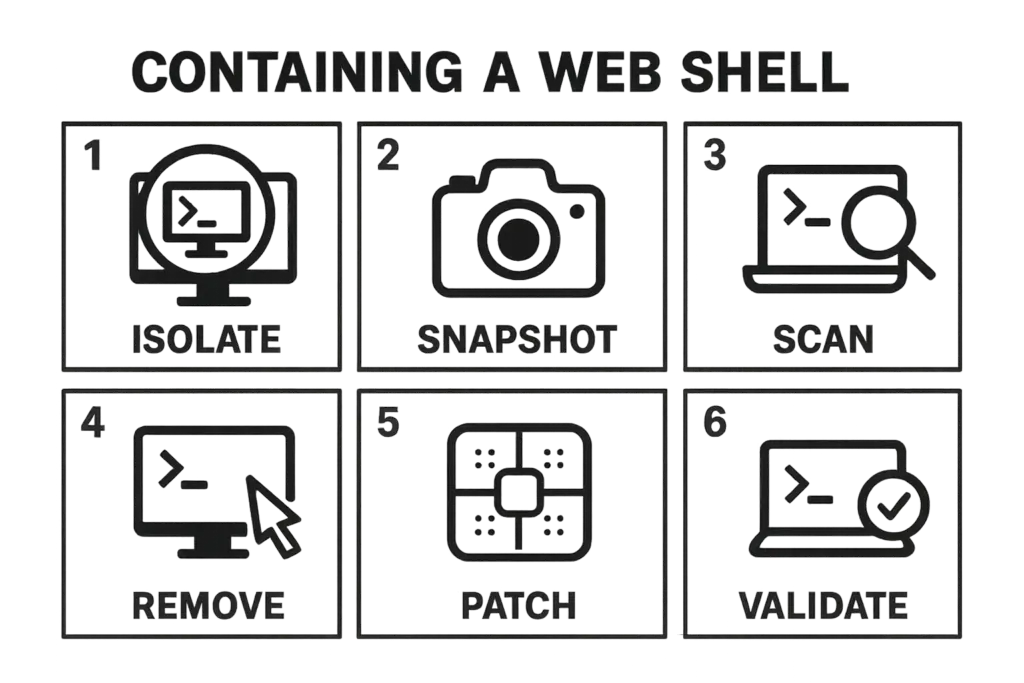
Checklist graphic illustrating steps to contain a web shell
Start with the basics every agency should enforce across client sites.
Remove unused code
Delete inactive plugins and themes. Attackers scan for known vulnerable assets; unused code is attack surface. Keep a strict inventory and remove any item not actively needed for the site.
- Checklist: run
wp plugin listand remove plugins withwp plugin delete <plugin-slug>. - Example: keep a per-client manifest that lists allowed plugins and versions; fail unknown assets into an incident review.
Harden credentials and access
Enforce unique admin accounts, remove shared credentials, and implement MFA for every administrative user. For agencies, centralize access through a vault and avoid shared passwords in chat or spreadsheets.
- Implementation: require MFA at the identity provider or force two-factor for WordPress accounts via an SSO plugin.
- Action step: revoke application passwords and rotate API keys during onboarding or after admin changes.
Fix file and folder permissions
Set wp-config.php and uploads to restrictive permissions and ensure the web server user cannot modify core files unexpectedly. Permissions misconfigurations let web-facing processes drop or modify PHP files.
- Example Unix commands:
chown -R www-data:www-data /var/www/example.com chmod 640 wp-config.php find wp-content -type d -exec chmod 755 {} ; find wp-content -type f -exec chmod 644 {} ; - Tip: define constants in wp-config.php:
define('DISALLOW_FILE_EDIT', true);and considerDISALLOW_FILE_MODSin maintenance windows.
Layer 2: Detect & contain malware and web shells
Detection is where you convert noise into decisive action. Instrument each layer that an attacker might touch.
Use file integrity and targeted scanning
Compare deployed files to a clean baseline and flag added or modified PHP files, especially in uploads, cache, or theme folders. Automated scanners will surface indicators of compromise and provide a prioritized list for triage; for example, use your centralized scanning tooling like the WordPress Scanner to generate repeatable scans across clients.
- Search examples:
grep -R --include="*.php" -n "base64_decode" wp-content/uploads grep -R --include="*.php" -n "eval(" wp-content/themes - Look for suspicious patterns: long encoded strings, gzinflate/base64 chains, and unexpected PHP files in uploads.
Monitor telemetry and anomalies
Track sudden spikes in file writes, unknown admin registrations, changes to .htaccess, unexpected cron entries, and outbound network activity. Convert these signals into an incident when multiple indicators align; see our operator guide for turning telemetry into fixes at From Noise to Action.
- Example detection rule set:
- High: new admin user + unknown PHP file in uploads
- Medium: repeated login failures from new IP blocks
- Low: single file write to theme folder
- WP-CLI cron check:
wp cron event list
— look for unexpected hooks or remote callbacks.
Containment patterns
When you detect a probable web shell, immediately isolate the site to stop further attacker activity. Use a network-level block or temporary maintenance page while you create snapshots for forensic analysis. Don’t delete evidence before snapshots are taken.
- Fast containment steps:
- Change admin routing: block /wp-admin and /wp-login.php via WAF or firewall.
- Enable maintenance mode and display a simple static page.
- Capture logs (access, error, FTP, database) and take filesystem + DB snapshots.
Layer 3: Remove persistence and restore trust
Containment buys time; removal and validation restore a client’s trust. Follow a cautious, documented process.
Forensic snapshot and analysis
Always take a filesystem and DB snapshot before deleting files. Label snapshots with timestamps and incident IDs to preserve an audit trail and enable post-incident learning. Keep at least one immutable copy (write-once) for legal or compliance needs.
Quarantine vs delete
When possible, quarantine suspicious files to a separate folder with a read-only copy rather than immediate deletion. Quarantine keeps a record while you validate whether a file is malicious or a false positive. Use a consistent quarantine path like /var/quarantine/<site>/<incident-id>/.
Credentials and lateral cleanup
Rotate all credentials: WordPress accounts, API keys, FTP/SFTP, and any third-party integrations. Attackers often leak or reuse those credentials across multiple client sites or systems.
- WP-CLI password rotate example:
wp user update admin --user_pass="Str0ng!NewPassw0rd"
- Also rotate salts in wp-config.php and revoke application passwords and OAuth tokens tied to the site.
Operational playbook: step-by-step checklist
- 1) Detect: collect indicators from logs, scanner output, and telemetry. Time target: 0–30 minutes after alert.
- 2) Isolate: block public access to admin and sensitive endpoints. Time target: 15–60 minutes.
- 3) Snapshot: take filesystem and DB snapshots for forensics. Time target: immediate before remediation.
- 4) Scan: run a full malware scan and export results. Include manual inspection for false positives.
- 5) Quarantine: move confirmed malicious files to a read-only quarantine folder with metadata.
- 6) Rotate: change all admin and system credentials; revoke API keys and application passwords.
- 7) Patch: update core, themes, and plugins and apply server-level fixes (PHP, web server, OS).
- 8) Validate: restore site from a clean baseline or rebuild affected components and verify functionality. Schedule re-scan at 48 and 72 hours.
Use this checklist as your ground truth during an incident. For a longer, battle-tested checklist you can adapt, see the How WordPress Hacks Actually Happen — Checklist Playbook and the Admin Access Lockdown playbook for staged responses and policy templates.
Common persistence locations attackers exploit
Knowing where to look shortens your mean time to containment.
Uploads and writable folders
Attackers hide PHP or encoded scripts in wp-content/uploads or temporary cache folders; treat any executable file in uploads as suspect.
Theme and mu-plugins folders
Malicious code is often added to active themes or mu-plugins for persistence; scan for recently modified files and compare to canonical versions. Keep canonical theme copies in source control to diff quickly.
Database options and scheduled tasks
Malicious options, admin entries, or scheduled WP-Cron jobs can recreate files or call remote payloads; inspect wp_options and cron entries during triage. Example DB query to find long autoloaded options:
SELECT option_name, LENGTH(option_value) AS len
FROM wp_options
WHERE autoload = 'yes' AND LENGTH(option_value) > 1000
ORDER BY len DESC;
How to operationalize this across many clients
Standardize responses, automate repeatable scans, and centralize telemetry. Build canned playbooks per site type and keep a public incident index for your operations team so that lessons learned propagate quickly.
Central scans and prioritized remediation
Schedule nightly scans and aggregate findings into a queue that your team can triage by severity and client business impact. Use the Operational Roadmap as a template to build your client-specific runbooks. Tag incidents with severity and SLOs so critical ecommerce or high-traffic sites get first attention.
Documentation and runbooks
Document detected indicators, containment actions, and recovery steps in a single incident file. Link to shared documentation like the Hack Halt product pages (Pro, ProSecure, Hack Halt Free) so operators follow the same validated steps. Keep a living incident index and update runbooks after every post-mortem.
See product options: products, Pro, ProSecure, Hack Halt Free.
Training and post-incident reviews
After each incident, run a short post-mortem, update your checklist, and train the team on any new attacker TTPs (tactics, techniques, and procedures) observed. Capture remediation time, root cause, and what controls failed so you can tune detection thresholds.
Operator example: triage flow in practice
Here is a short example flow you can adopt across clients: on an alert, immediately create snapshots, block admin access, run the WordPress Scanner to enumerate suspicious files, quarantine confirmed web shells, rotate credentials, apply patches, and validate. Document everything and schedule a follow-up scan 48 hours after reopening to ensure no staged reentry occurred.
Real-world note: for WooCommerce or checkout-targeted incidents, follow focused abuse mitigations; we dissect common mistakes in the Fight Back teardown series for eCommerce managers in Fight Back: Teardown and Tactical Teardown.
When you need tooling that unifies scanning, telemetry, and response controls into a repeatable workflow for client fleets, consider using Hack Halt Inc. to implement these controls quickly and consistently across sites. Review plan options at the Home page and pricing references on the site to scale this approach for your agency.
Final checklist (quick reference)
- Detect: scanner + logs + telemetry
- Isolate: block or maintenance mode
- Snapshot: filesystem & DB (immutable copy)
- Scan: automated and manual inspection
- Quarantine & remove: verified malicious items
- Rotate credentials & revoke keys
- Patch & harden: core, plugins, server
- Validate & monitor: re-scan and watch for reentry (48–72 hours)
FAQ
How long should I keep forensics snapshots?
Keep snapshots until the incident is fully investigated and any legal or compliance retention windows have passed; a minimum of 30 days is common, but store longer if you suspect data exfiltration or regulatory requirements apply. Keep at least one immutable snapshot for audit.
Can I restore from an old backup safely?
Yes, but only after validating the backup was taken before the compromise window and after scanning it for malware. If you cannot validate, rebuild from a clean source and reapply content carefully. Use source control for themes and plugins so rebuilds are deterministic.
What’s the best way to prevent re-infection?
Prevent re-infection by removing all persistence, rotating credentials, patching vulnerabilities that allowed the initial access, and ensuring ongoing detection and file integrity monitoring remain active. Tie remediation to a post-incident scan baseline and monitor closely for at least 30 days. Layered controls—MFA, strict permissions, WAF rules, file integrity, and scheduled scans—are the operational definition of “wordpress hacks layered defense.”
How do I prioritize when many client alerts arrive?
Use a simple risk matrix: business impact (revenue/traffic/data sensitivity) × technical confidence (number of aligned indicators). Triage high-impact + high-confidence alerts first, and automate lower severity items into nightly remediation queues.
If you want a structured roadmap you can adapt immediately, review the Layered Defense Roadmap and the incident-focused hardening guidance at Reduce Plugin Exploit Risk During Disclosure Windows.